
Melbourne Backed Renovation Briefs for Australians with 10% Contingency

A renovation design brief is the written roadmap that tells your designer or builder exactly what you want, where the money can go, and what your site allows. Get it right, and you align homeowner, designer and builder from day one, which cuts the back-and-forth that blows out timeframes and budgets. The clearest sign it’s working: your designer or builder can hand you concept drawings and a realistic cost estimate without a dozen follow-up calls.
TL;DR:
A clear renovation brief should specify project priorities, site constraints, and a realistic budget range with contingency to prevent scope creep and delays.
Providing comprehensive site surveys, existing plans, and inspection reports upfront reduces rework and accelerates design progress.
Budget estimates must include all costs beyond construction, such as permits, fees, and contingencies, with clear allowances for fixtures and finishes.
Early identification of regulatory restrictions like heritage overlays or bushfire zones guides feasible design solutions and planning approval pathways.
Iterative discussion and thorough documentation during the briefing process ensure the designer understands actual needs, minimizing costly modifications later.
Table of Contents
What is a renovation design brief, and why does it matter in Australia?
How do you prepare a renovation design brief before your first meeting?
How do you brief an architect, designer or builder in the first meeting?
What Australian building regulations should shape your brief?
How do you build energy efficiency into your brief for your climate zone?
What common challenges catch out Australian renovation projects?
How should you prioritise features given typical budget constraints?
How does your brief connect to council approvals and permits?
What is a renovation design brief, and why does it matter in Australia?
An effective renovation design brief acts as your project’s roadmap. It sets out your goals, budget, site constraints and lifestyle needs so a builder or designer can respond with real solutions rather than guesses.
Here’s what a solid brief covers, and why each piece earns its place:
Project description and outcome. Are you extending, renovating within the existing footprint, or planning a full rebuild? Name it clearly.
Must-haves versus nice-to-haves. Split your wish list into three tiers: non-negotiable, strongly preferred, and “if budget allows.” This single step prevents the vague priorities that lead to mid-project scope creep.
Lifestyle requirements per room. Note how each space actually gets used. A “spare room” used daily as a home office is a different brief than a guest room used twice a year.
Design preferences. Annotate moodboard images with what you like about each one. “This kitchen” means nothing. “This kitchen’s window placement over the sink” means everything.
Site constraints. Flag heritage overlays, bushfire-prone zones, flood mapping, or a sloping block early. These shape what’s even possible before design begins.
Budget range with contingency. Give a realistic bracket, not a single hopeful figure, and build in room for the unexpected.
A brief built this way does more than list preferences. It gives your designer boundaries and purpose, which lets them solve problems with intent rather than guesswork.
How do you prepare a renovation design brief before your first meeting?
You don’t need a finished document before you walk into a design meeting, but you do need more than a Pinterest board. Here’s a sequence that works:
Write a short vision statement. Two or three sentences on why you’re renovating and what success looks like. “We need a kitchen that lets one parent cook while supervising homework at the table” tells a designer far more than “bigger kitchen.”
Build must, want and wish lists. Where relevant, add approximate sizes: “master bedroom, minimum 4m x 4m” is more useful than “bigger bedroom.”
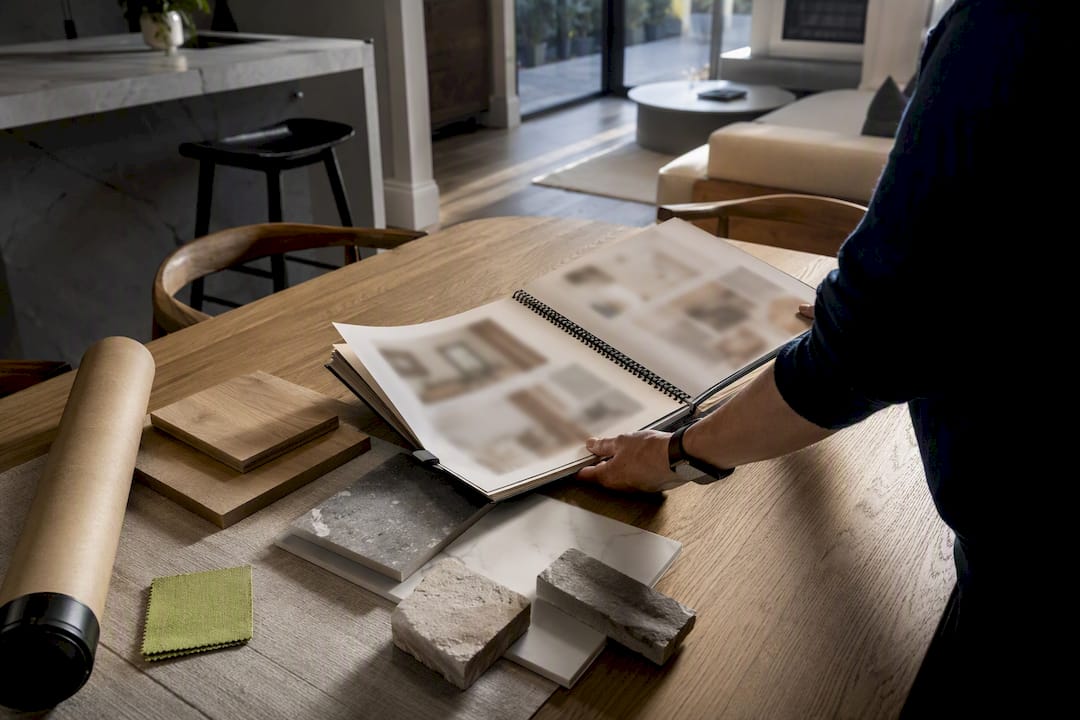
Assemble a scrapbook or digital moodboard. Pull images from magazines, Pinterest, or homes you’ve walked through, and annotate what you like and dislike about each.
Collect site photos and existing drawings. Photograph every façade and key room, and track down any drawings from when the home was built or last altered. Order missing surveys now rather than later.
Set a realistic budget range and flag hard deadlines. Note anything immovable, like a lease expiry or a baby due date.
Plan to iterate. Treat your first draft as a discussion starter, not a finished brief.
That last point matters more than most homeowners expect. A strong brief develops through iterative conversation; written documentation only becomes useful once it’s tested against a professional’s questions about how your household actually functions.
Pro Tip: Bring your scrapbook to the first meeting even if it feels unpolished. A designer reading your “dislikes” often learns more about your taste than from your “likes” alone.
What documents and site information should you provide?
The documents you hand over on day one determine how fast the real work starts. Missing paperwork is the single biggest cause of delayed first-stage design work.
Boundary and levels surveys. These confirm your block’s exact dimensions and slope, usually obtained through a licensed surveyor.
Existing floor plans, elevations and recent photos. Cover every façade and every room you’re touching.
Soil, contamination and building inspection reports. Include any asbestos or termite notes from previous inspections.
Council planning overlays and heritage listings. Check these through your local council’s planning scheme, along with any prior approvals on the property.
Utility locations and past engineering or certifier reports. Anything from previous work on the home saves your team from re-investigating what’s already known.
Supplying this material upfront significantly reduces rework and flags planning risks before design work begins, not after.
How should you budget and set a realistic timeline?
Present your budget as a range, not a single number, and make sure it covers more than construction costs. Include GST, builder’s PC (prime cost) items for fittings and fixtures, consultant fees, and a genuine contingency. How much depends on what you’re doing: around 10% is workable for cosmetic work where there’s little hidden risk, but for anything structural — or any older home where the subfloor and footings haven’t been inspected up close — budget 15% to 20%. If your brief involves removing walls, extending, or touching a heritage property, plan at the higher end.
Professional fees to expect. Architects, structural engineers and building surveyors each charge separately, and their fees typically apply at different project stages, not all upfront.
Timeline choices affect cost. Staging a renovation around school holidays or a lease expiry date can narrow your builder’s scheduling options, which sometimes pushes costs up.
Questions to ask about any estimate. What’s included, what’s excluded, and what allowances are assumed for items like tiles or tapware? An estimate without clear allowances is a guess dressed up as a number.
Vague or shifting requirements are a primary driver of budget blowouts, which is exactly why the contingency line in your brief isn’t optional padding.
How do you brief an architect, designer or builder in the first meeting?
Expect your first meeting to feel like an interview, but one running in both directions. Professionals will ask about your household routines, how long you plan to stay in the home, and which items on your brief are genuinely fixed versus flexible.
Typical questions to expect. How many people live in the home, what’s your morning routine, which rooms get used daily versus rarely?
Record every decision in writing. Update your brief after each meeting so it stays the single reference point for scope.
Watch for red flags. Vague priorities, missing site information, or a pattern of scope changes are all signs the project needs tighter documentation before proceeding.
Know when to bring the builder in. Some homeowners keep decisions at the design stage until drawings are close to final; others prefer early builder input on buildability and cost. Either can work, but decide deliberately.
Pro Tip: After every meeting, email a one-page summary of what was agreed. It becomes your project’s paper trail if memories differ later.
How does Yorcon use your brief on real Melbourne projects?
We read every brief for what it says and what it leaves out. A brief that names must-haves, flags heritage constraints and includes a survey lets us give early, honest cost feedback rather than a vague range.
The most common gaps we see are missing boundary surveys and priorities that read as “everything is essential.” Both slow a feasibility conversation down. When a homeowner brings a clear brief to a feasibility call, we can talk through staged proposals and realistic costs in that first sitting, rather than circling back weeks later for information that should have come with the brief itself.
What Australian building regulations should shape your brief?
Your brief should acknowledge, even briefly, the regulatory layer your project sits under. The National Construction Code sets minimum standards for structural safety, fire safety, health and amenity, and energy efficiency across Australia, and it applies to renovations and extensions, not just new builds.
On top of the Code, most states run their own planning and building approval systems, which is why a renovation that’s straightforward in one council area can trigger a full planning application in another — called a planning permit application in Victoria, a development application in New South Wales and Queensland. If your home carries a heritage overlay, expect additional design controls on things like façade changes, roof pitch and material choices. Bushfire-prone areas add construction standards under Australian Standard AS 3959, covering ember protection and material resistance. Flood-prone or coastal sites may trigger additional engineering requirements for floor levels or footings.
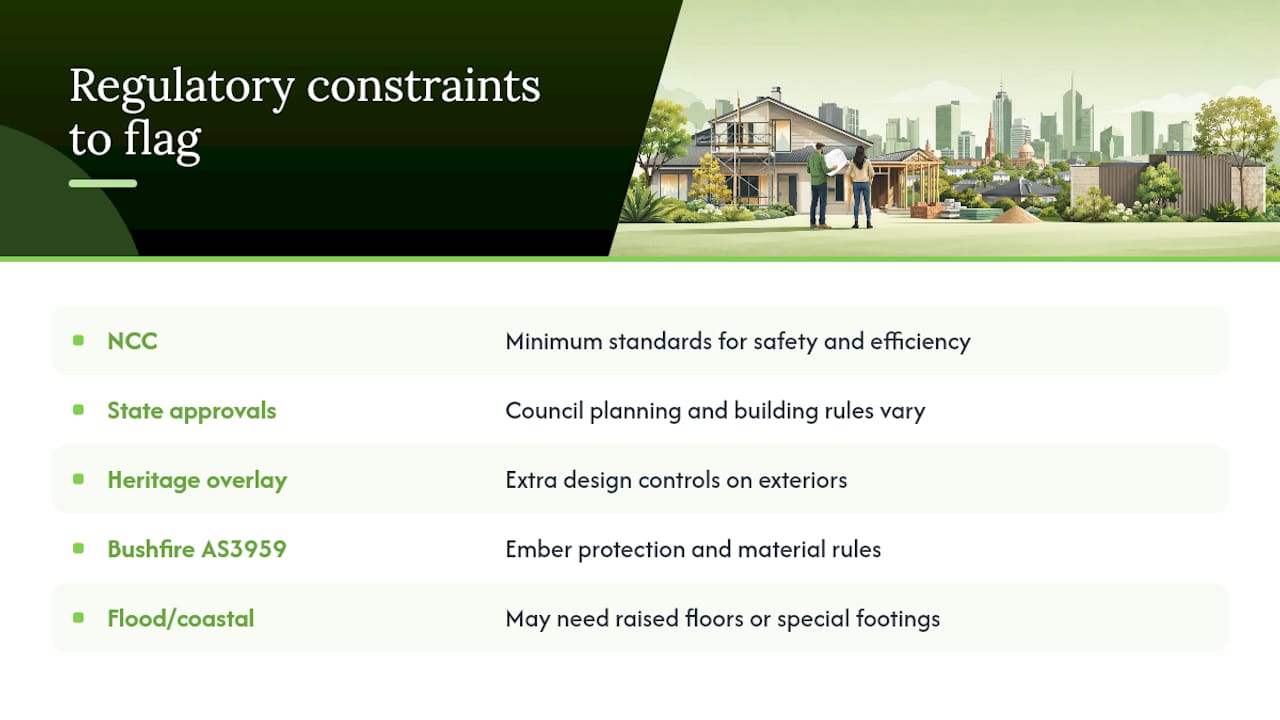
None of this needs to appear in forensic detail in your brief. What matters is flagging that you know these constraints exist, and asking your designer or builder early which ones apply to your specific site. A brief that says “we understand this property has a heritage overlay, please advise what that means for our extension” saves a meeting’s worth of back-and-forth compared to one that stays silent on the issue until a council response arrives.
How do you build energy efficiency into your brief for your climate zone?
Australia’s climate zones, as mapped by the Nationwide House Energy Rating Scheme, range from hot humid summer zones in the north to cool temperate zones in the south, and what counts as good passive design changes accordingly.
If you’re in Melbourne or a similarly temperate zone, your brief should note priorities like north-facing living areas, double glazing, and thermal mass in floors or walls that store winter sun and release it overnight. In hotter zones, the priorities shift toward shading, cross-ventilation and reflective roofing to keep heat out rather than trap warmth in.
Rather than listing technical specifications you may not fully understand, describe the outcome you want: “we want the living room warm through winter without running heating constantly” gives a designer more to work with than “install double glazing.” Note any existing NatHERS rating if your home has one, and mention if solar panels, battery storage or a heat pump system are on your wish list, even as a “nice-to-have.” Our passive design checklist walks through the specific checks worth briefing your builder on before design starts.
What common challenges catch out Australian renovation projects?
A handful of issues come up again and again on renovation projects, and each one is easier to manage when your brief addresses it directly rather than leaving it to chance.
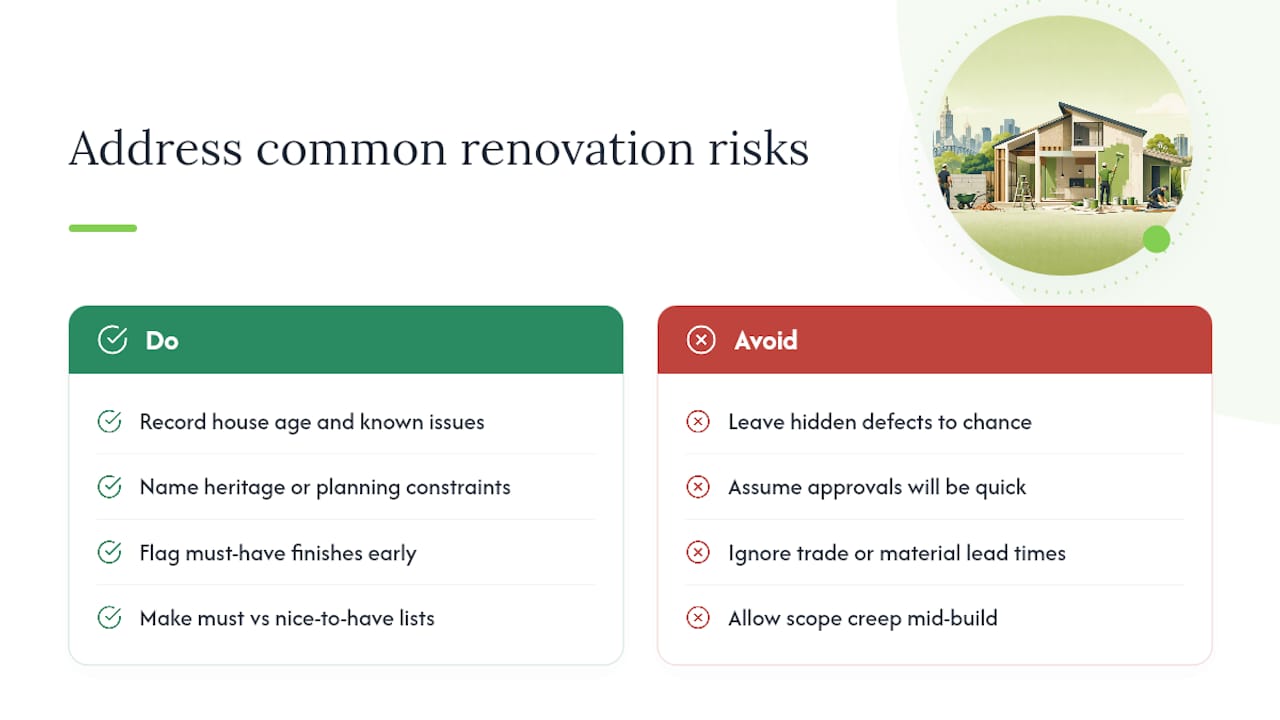
Older homes often hide surprises once walls come off, including outdated wiring and asbestos in unexpected places. Note your home’s approximate age and any known issues in the brief so your team can budget contingency accordingly. Council approval delays are another recurring frustration, particularly in areas with heritage overlays or overlapping planning controls; naming these constraints in your brief lets your designer plan a realistic approval pathway from the outset.
Trade and material availability can also shift a timeline, especially for custom joinery or imported fittings, so flag any must-have finishes early. And scope creep remains the single most common budget killer on renovation projects. Your must-have and nice-to-have lists exist specifically to guard against this: when a “wouldn’t it be nice” idea surfaces mid-build, the brief becomes the reference point for whether it fits inside the original scope or needs a separate conversation about cost and time.
How should you prioritise features given typical budget constraints?
Most Australian renovation budgets can’t stretch to everything on a homeowner’s wish list, which is exactly why the must-have, want and wish structure matters more than any single feature choice.
Structural and compliance items come first, always. Waterproofing, structural changes, and anything required to meet the National Construction Code aren’t negotiable line items, even though they rarely show up on a homeowner’s Pinterest board. After that, prioritise the spaces you use daily over the ones reserved for guests: a better-functioning kitchen used three times a day delivers more lived value than a rarely used formal lounge.
Finishes are the easiest category to defer without touching your layout. Cabinetry, benchtops and tapware can often be a lower grade at handover and upgraded later, whereas layout changes made after the fact mean re-opening walls. If your budget is tight, consider staging the project: complete the structural and layout work now, and defer cosmetic finishes to a second phase once funds allow. Naming this staging preference in your brief upfront helps your builder plan a sensible sequence rather than assuming everything happens in one pass.
How does your brief connect to council approvals and permits?
Your design brief and your council approval pathway aren’t separate processes; they run in parallel, and the sooner your brief acknowledges local planning rules, the smoother that pathway tends to be.
Most Australian councils publish an online planning scheme that shows overlays affecting your specific property, including heritage, vegetation protection, and flood or bushfire risk zones. Check yours before your first design meeting, and mention any overlays you’ve found in your brief. Some renovations qualify for a faster building permit pathway with no planning approval required, particularly minor works that meet standard setback and height rules; others, especially anything visible from the street on a heritage-overlaid property, need full planning approval. The public notice period itself is relatively short, but where objections are lodged, the overall assessment can run for months.
Your brief should note any time pressure tied to this process, because a designer who knows you’re working to a lease expiry or a specific moving date can plan the documentation to suit the likely approval timeframe rather than the fastest possible design. Ask your designer directly, early, whether your project is likely to need planning approval or can proceed on a building permit alone. That single question shapes both your timeline and how much design flexibility you have before lodging anything with council.
A note on why the brief matters more than homeowners think
A vague brief doesn’t just slow down the first meeting; it compounds into cost overruns and design compromises months later, once concrete decisions have already been poured. What surprises most homeowners is that the brief isn’t a constraint on creativity; it’s what lets a designer take real risks with a solution because they understand your actual priorities rather than guessing at them. Yorcon manages that brief through to build precisely because the document that starts a project should be the same one that finishes it.
Ready to turn your brief into a real project?
You’ve done the hard part: a clear brief with your must-haves, your site details and a realistic budget range. The next step is putting it in front of people who can turn it into drawings and a build program without losing anything in translation.
Some builders manage the full journey from that brief through to handover, rather than handing you off between separate design and construction teams. For homeowners planning a renovation, our Home Renovations service takes your brief and works it into a staged proposal with early cost feedback, so you know where you stand before committing to detailed drawings. If your project spans both design and construction under one roof, our Design & Build service keeps your brief as the single reference point the whole way through, which is exactly the continuity a good brief is built to protect. Bring your vision statement, your must-have and wish lists, any surveys or existing drawings you’ve gathered, and your budget range to a free project feasibility call, and we’ll talk through what’s realistic for your site and budget before you spend a dollar on formal design work.
Where to go for more Australian briefing guidance
For deeper checklists, the Houzz Australia guide to writing a design brief and the downloadable AAArchitect 10-step briefing guide both offer practical, Australia-specific templates worth working through before your first design meeting.
Sources
FAQ
What is a renovation design brief?
It’s a written document outlining your project’s goals, budget, site constraints and lifestyle needs, used to guide architects and builders toward accurate concept designs and cost estimates.
How detailed does my first draft need to be?
Detailed enough to spark a real conversation, not perfect. Most briefs get refined significantly after the first professional meeting, so treat your draft as a starting point.
What documents should I gather before my first meeting?
Boundary and levels surveys, existing floor plans and elevations, recent photos of every façade and key room, and any prior inspection or council approval records for the property.
How much contingency should I include in my budget?
It depends on scope. Around 10% above your base estimate is workable for cosmetic renovations. For structural work, older homes, or heritage properties, budget 15% to 20% — the hidden risk is much higher once walls and floors come off. That sits on top of GST, builder’s PC items and consultant fees for architects, engineers or building surveyors.
Does Yorcon help homeowners prepare or refine their design brief?
Yes. Yorcon works through your brief during a free project feasibility call and uses it to scope staged proposals with early cost feedback for your specific renovation.
What’s the biggest mistake homeowners make in their brief?
Leaving priorities too vague, or listing everything as essential. Splitting your list into must-haves, wants and wishes is what actually protects your budget once building starts.
Recommended


